Wireless hotspots are places where one or more wireless networks are available for the general public to use, such as a library or coffee shop. It’s easy to connect to a wireless hotspot with Windows 7 because the software constantly looks for a working Internet connection.
- Turn on your laptop’s wireless adapter, if necessary.
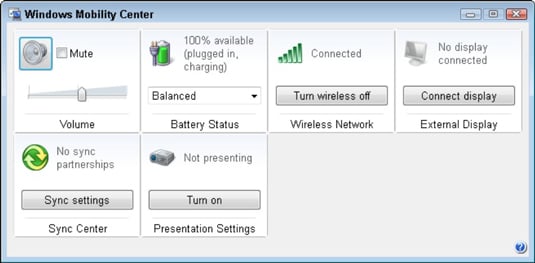
 You can often turn it on with a click in the Mobility Center. Alternatively, you might need to press the manual switch somewhere on the case or plug in a wireless adapter.
 - Click your taskbar’s network icon.
 Windows 7 lists all of the available options for connecting with the Internet — including any wireless networks within range.
 - Connect to the wireless network by clicking its name and clicking Connect.At many places, clicking Connect may connect your laptop to the Internet immediately. But if your laptop asks for more information, move to Step 4.
- Enter the wireless network’s name and security key/passphrase, if asked.If you’ve selected an Unnamed Network, you’ll need to supply the correct network name. Depending on the security of the network, you might also need a security key or passphrase.
- Click Connect.Windows 7 announces its success.
- (Optional) Click the two boxes, Save This Network and Start This Connection Automatically.Windows 7 will stash the network’s settings so that next time you’re within range, your PC will automatically connect.
If Windows 7 finds a hotspot, it sends the information to Internet Explorer and you’re good to go. If it doesn’t find the hotspot on its own or if there’s more than one network available, you’ll have to guide Windows 7 through the process.
